

How To Create A Distressed Look In Illustrator
Texture masking is a great way to add a worn, aged look to your vector designs. In this tutorial I'll be demonstrating how you can apply a distressed texture with Illustrator. This is something that can be done in just a few clicks.
The following is a written overview of the steps taken to apply textures in Adobe Illustrator. For more detailed instructions I would recommend watching the video tutorial at the top of the page.
Apply A Distressed Texture with Illustrator
The following video tutorial will walk you through the entire process. Continue on for the written instructions.
Adobe Illustrator is typically used for vector graphic design, but in some instances you can use raster images to enhance your vector creations. Texture masking is a great example of such, and in Illustrator we can use the opacity mask to accomplish this.
In Illustrator, the opacity mask is used to create areas of transparency and opacity in your design by using black and white. Black areas become transparent, whereas white areas remain opaque. Gray areas will have partial transparency based on how dark or light they are.
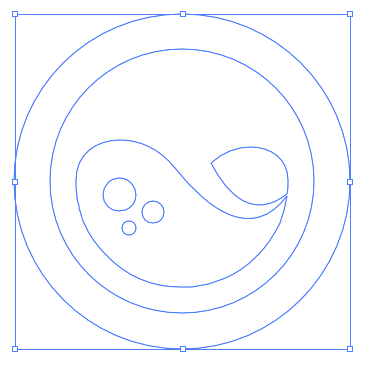
The first step is to select the design you'd like to apply the distressed texture to and group it together by pressing control + g on your keyboard.

Now we need to bring up the Transparency window. To locate this, navigate to Windows > Transparency.
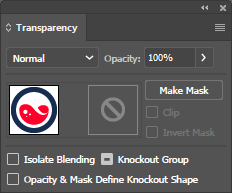
Once you have the Transparency window open, make sure that there's a thumbnail preview of your design visible in the menu. If not, click on the little hamburger menu icon in the top-right of the window and click on Show Thumbnails.
Now that we have the Transparency window active, let's identify the distressed texture you'd like to apply to your design. The texture must be a black and white image. For this demonstration I'll be using the following texture…

If you're in need of some distressed textures then be sure to check out my collection of 15 free grunge textures.
Copy the texture to your clipboard by selecting it and pressing control + c on your keyboard.
Now, select the design that you'd like to apply the distressed texture to, then click on the Make Mask button in the Transparency window. This will make your design temporarily invisible.
If you glance over at the Transparency window, you'll notice that there's a black fill in the preview thumbnail to the right of your design's thumbnail.

Activate the black thumbnail by clicking on it, then paste your texture into it by pressing control + v on your keyboard. This will apply the distressed texture to your design.

Like I mentioned earlier, the opacity mask works by making black areas of your design transparent and white areas fully opaque. In this example, you'll notice that the black area of the distressed texture became transparent on the design and the white areas remain visible.
You can adjust your texture by moving it, scaling it, or rotating it, the same way you would any other image.
Once you've adjusted your texture to your liking, you can go back to working with your original design by clicking on the design's thumbnail preview in the Transparency window to activate it.
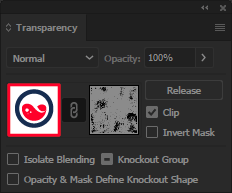
This technique is non-destructive and can be undone at any point. To do so, simply click on the Release button in the transparency menu.
That is how you can apply a distressed texture in Adobe Illustrator! If you have any questions or need clarification on any of these steps simply leave a comment below. As always, thanks for watching!
Logos By Nick LLC is a participant in the Amazon Services LLC Associates Program, an affiliate advertising program designed to provide a means for sites to earn advertising fees by advertising and linking to Amazon.com. As an Amazon Associate I earn from qualifying purchases. Read affiliate disclosure here.
How To Create A Distressed Look In Illustrator
Source: https://logosbynick.com/apply-a-distressed-texture-with-illustrator/
Posted by: ramergoope1995.blogspot.com
0 Response to "How To Create A Distressed Look In Illustrator"
Post a Comment